
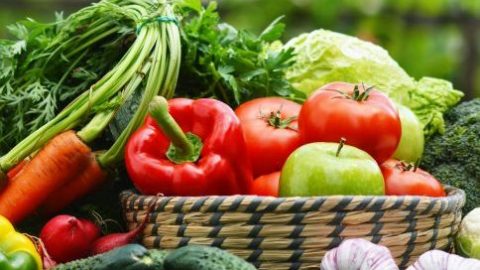
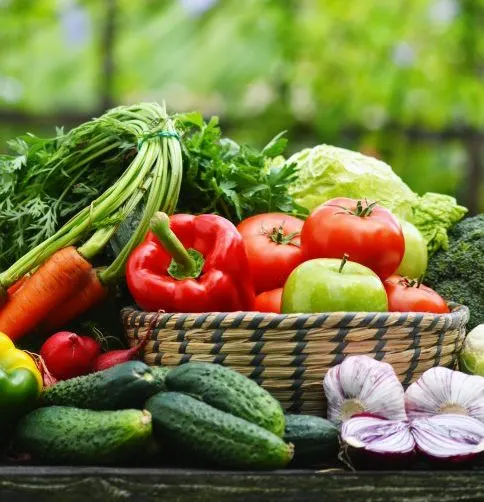
If you’re interested in picking up a fresh, at-home activity, producing edible indoor plants such as radishes, turnips and arugula right inside your South Florida home is fun, relatively easy and relatively inexpensive.
For wisdom on the topic, we solicited tips from a South Florida urban horticulture program specialist affiliated with the University of Florida Institute of Food & Agricultural Sciences, also known as IFAS.
(Photo courtesy of University of Florida/IFAS)
Maybe you’ll be inspired. Ideally, you’ll be richly rewarded with a delicious sense of accomplishment and tasty freshly harvested produce.
Read our Q&A with Samuel Chillaron, Urban Horticulture Program specialist, Florida Yards and Neighborhoods Program for UF/IFAS Extension Miami-Dade.
Thanks, Sam!
To keep up with latest news, sign up for the daily Miami on the Cheap newsletter. You can also follow us on Facebook and on Twitter and visit our Facebook group page.
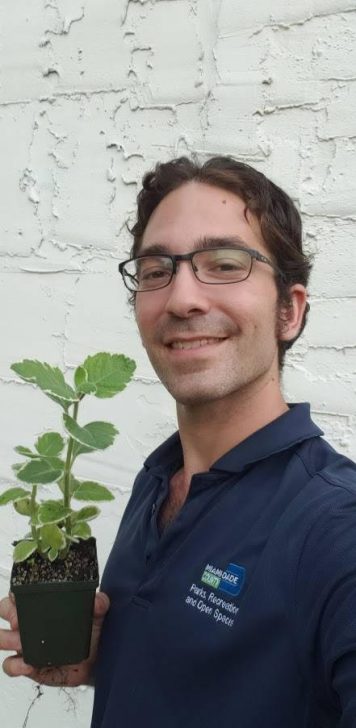
Sam Chillaron
Q: What edible plants work nicely indoors in South Florida
A: The summer is a unique time for indoor gardening in South Florida. Our climate-controlled homes combined with the longer days of summer can make for good indoor growing conditions – especially for herbs and baby greens.
In general, the edible plants that perform best indoors are those that grow quickly and are smaller in stature. This includes a large variety of herbs, leafy greens, micro-greens and quick growing root vegetables like radishes and turnips.
The more direct light that can be provided to your indoor edibles, the wider the variety of plants you can grow. Leafy greens and herbs require an average of 4-6 hours of light to grow a harvestable yield. This can be supplied reasonably by a windowsill or a sunward facing sliding glass door.
Popular vegetables producing fruits or crunchy stems like tomatoes, broccoli and strawberries require at least 6-8 hours, and when grown indoors will require supplemental lighting. This can get expensive considering the cost of grow lights and their energy expenditure.
Q: What type of indoor set-up and equipment is required
A: As with any gardening endeavor our main guiding principle is Right Plant, Right Place. We want to site our indoor edible gardens in the sunniest part of the house. Almost all edible plants need ample sunlight in order to grow well.
The most simple set-up involves nothing more than a pot with drainage holes, potting mix, a tray or dish to catch excess drainage water and a sunny window or glass door for the plants to sit next to.
Most South Floridians keep the temperature inside the home somewhere between 75 – 80 F during the summertime and throughout most of the year. Luckily, this is also the ideal temperature range for growing most of our favorite vegetables.
For indoor gardeners lacking sunny windows or natural sunlight, the next best option will be the use of grow lights. The set-up for this type of indoor garden involves the lights themselves, a stand or shelf to mount the light over the plants and a container garden or hydroponics growing system. If the indoor garden is large enough or the grow lights being used generate excessive heat a fan or cooling system will also be required.
One of the most popular indoor gardening set-ups involves using stainless steel wire shelving, shop lights and LED grow lights. This system is perfect for indoor growers who are looking to experiment with micro-greens and growing their own plants from seed as well.
Q: Is this expensive, or is it valuable for people seeking to reduce food expenses?
A: Indoor gardening can either be very cheap or very expensive depending on your goals. If you have a sunny spot in the house and frequently purchase micro-greens, baby greens or herbs such as cilantro, parsley or chives then growing your own at home is definitely a great way to save on these high value crops and enjoy the fruits of your labor.
For larger vegetables, such as tomatoes, peppers or strawberries the higher investment in necessary equipment to achieve worthwhile yields may not be worth it economically speaking. You are probably better off supporting your local farmers by purchasing these crops from them.

Q: What are the easiest indoor edibles for novices?
A: In the area of leafy salad greens, arugula is by far the easiest to grow. It germinates quickly and provides multiple harvests. Once it grows to about 6 inches tall you can harvest with a knife or pair of scissors by simply cutting the plants about an inch above the line of the soil. In one to two weeks the arugula will be ready for another cut and come again harvest.
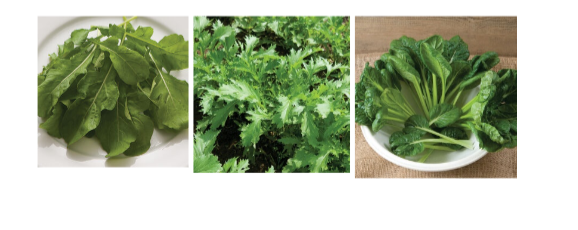
Indoor gardeners may also be interested in trying to grow other baby greens such as mizuna, mustard greens and tatsoi. Simply sprinkle the seeds over the surface of the soil and cover with a dusting of potting mix. Water them in with a light spray of water (a spray bottle works well) and keep moist to ensure even germination. Kale, Collard Greens and Swiss Chard may also be grown in the same way for baby greens. Lettuce is a bit more challenging, as it loves to grow in bright light, but also worth trying. Follow the same growing steps as the above baby greens.
When it comes to herbs, most are relatively easy to grow, however, seed germination time is longer. The trick is to keep the potting soil moist, but not to overwater. It is ok to allow the top of the soil to dry slightly in between watering. Many herbs are also easily grown from cuttings. Rooting hormone is often not necessary. Simply clip a branch from a friend’s plant, remove leaves from the bottom portion of the cutting, insert into a small pot with potting mix and keep moist for about two weeks. Pretty soon roots will start to develop. Excellent herbs for the indoor garden include: cilantro, parsley, basil, garlic chives and thyme.
Another indoor crop worth trying is microgreens. Microgreens are edible plants that are only grown to the first true leaf stage after germination. It is believed that because growth is powered by the stored energy of the seed it is at this baby stage that the plants are at their nutritional peak for consumption. The easiest microgreens crop to grow for beginners is sunflower shoots and pea shoots. Many micro-greens kits are available for purchase online as well as the bulk seed necessary to grow them.
The basic steps are to fill a tray with potting mix and to densely sprinkle the seeds over the surface of the soil. A dusting of potting mix over the top of the seeds is not required. Moisten the seeds with a light spray and nest an empty tray with the same dimensions over the top of the seeds. In about one week most of the seeds will have germinated and the empty top tray will begin to rise as the seeds literally push it up.
At this point you want to flip the top tray around to create a dome or shell over the germinating seeds. Your goal is to temporarily block out the light. This will encourage the microgreens to grow upwards and elongate, creating more food. Once the seedlings reach the top of the upper tray, remove the tray. The seedlings will be long and mostly white and yellow. Gradually expose these elongated seedlings to light and they will green up. Once they are nice and green, simply cut the microgreens at soil level and enjoy.
Q: Do you do this at home, and what are your favorite plants?
A: Yes, I do maintain a small indoor garden on my kitchen windowsill consisting mostly of herbs. My favorites to grow are basil, garlic chives, thyme, cilantro, parsley and rosemary. When I am cooking there is nothing more enjoyable than harvesting what I need right then and there to add the freshest possible flavors to my food.
Q: Any other tips or recommendations or thoughts on why South Floridians would want to try this in their own homes?
A: Indoor gardening is a great way for those without traditional backyard space to experience the joy of growing their own food. It is not only functional, but very therapeutic and rewarding.
If you choose to grow your indoor edibles in containers, with some plants you will eventually need to up-pot them as they grow larger and larger. The key to doing this correctly is to gradually increase the pot size rather than going from a small pot directly to a very large pot. By slowly increasing the pot volume over time you will prevent issues related to over-watering.
Many of your indoor edibles will also benefit from periodic applications of fertilizer. I recommend a slow-release organic fertilizer – there are many available on the market. As with any fertilizer or pesticide, whether its organic or not, it is important to read the label and use according to the instructions.
As for watering, you want to check your plants daily. Apply water only if the surface of the soil looks dry. Your goals should be to thoroughly water so that the entire volume of the soil in the pots becomes wet. Lifting the plant before they are watered and after they are watered will help you to develop a sense of whether you watered enough. There should be a significant weight difference between plants that have been watered well and those that are still thirsty.
Gardening is a skill like any other. With time and patience anyone can learn to do it well and produce bountiful harvests.
Other resources from IFAS
- Indoor Gardens
- Microgreens: A New Specialty Crop
- UF Gardening Solutions Website
- Hydroponic Vegetable Gardening
- Container gardening for outdoor spaces
- Growing Fruit Crops in Containers
More Useful Resources
- Free employment resources & recruitment events for Florida residents
- Free food-distribution events & food-drive drop-off information
- Register for free library e-card for lots of online resources
- Inexpensive rabies vaccines for pets
- Libraries offer drive-up & walk-up opportunities
- Deals for veterans, first responders & other front-line heroes
- Rent, utilities & other financial resources for Florida residents
- Free school supplies, events & resources
- Where to get a COVID vaccine in Miami-Dade
- Check out Miami On The Cheap’s special coupons page
